How to check tire pressure? This is a common question whenever we discuss car maintenance. Tire pressure might not seem like a big deal in car maintenance, but it’s a pretty important part that many drivers tend to forget about. It’s one of those fundamental things that has a significant impact on how safe, efficient, and well your car performs.
The right tire pressure isn’t something you should underestimate because it affects several crucial aspects of your car’s performance.
Having the correct tire pressure ensures that your car handles well and maintains a good grip on the road. It’s also a key factor in getting the most out of your fuel, which means better mileage and fewer trips to the gas station. Plus, it helps extend your tires’ lifespan, saving you money in the long run.
Table of Contents
Understanding Tire Pressure Measuring
To determine “What should my tire pressure be?” you need to understand tire pressure measuring. Measuring tire pressure means making sure your car’s tires have the right amount of air for safe driving. This is usually done using a specialized gauge.
The right tire pressure is the most important factor for safe and efficient driving. Too little or too much air in the tires can affect your car’s handling, fuel efficiency, and overall safety. Regularly monitoring and adjusting tire pressure according to the manufacturer’s recommendations is a simple yet vital practice for a well-maintained vehicle and a smoother, safer ride.
Why Maintaining the Correct Tire Pressure is Important?
Checking and maintaining your tire pressure is important to ensure:
- Safety: Having the right tire pressure is a must for your safety while driving. When your tires lack enough air (underinflated), they tend to flex more and can get hot, which might cause a tire blowout, especially when you’re driving at higher speeds.
Underinflated tires can also make your vehicle less stable, making it tricky to handle sudden turns or challenging weather conditions like rain or snow. Conversely, when there’s too much air (overinflated), your tires have less grip, resulting in reduced control and longer stopping distances, especially on slippery roads.
Efficiency: Tire pressure plays a significant role in how much fuel your car consumes. Underinflated tires create more resistance when rolling, which means your engine has to work harder to move your car. This extra effort leads to more trips to the gas station, costing you extra money.
On the other hand, overinflated tires, while providing less traction, can lead to uneven tire wear. This uneven wear means you’ll have to replace your tires more often, adding to your expenses.Handling and Performance: The right tire pressure makes your car handle better, especially in turns and quick moves, and it also makes your ride more comfortable.
When your tires have the right pressure, your car is easier to control, and your journey is smoother.Environmental Impact: Keeping your tires at the correct pressure is not only good for your car but for the environment too.
Your automobile consumes less gas when it is properly inflated, which means it sends fewer greenhouse gases into the atmosphere, thereby helping to decrease your carbon footprint.
What Should My Tire Pressure Be?
It’s important to note that the correct tire pressure can vary from one vehicle to another, even among cars of the same make and model, depending on factors like tire size and load capacity.
Here’s how you can find out what your tire pressure should be:
- Check the Owner’s Manual: You will find the information in your vehicle owner’s manual. Check for the section called Tire Maintenance. The manual generally provides the data on the appropriate tire pressure for both the front and rear tires. The manual may also provide different recommendations based on factors like load capacity and driving conditions of your vehicle.
- Inspect the Door Jamb: Open the driver’s side door and take a look at the door jamb. You’ll often find a sticker there providing critical information, including the recommended tire pressure for your specific vehicle. The sticker may also contain details about tire size, load capacity, and other essential data.
- Glove Compartment Reference: In some cases, you might find a sticker or a card with tire pressure information inside your car’s glove compartment. Or maybe on the inside of the fuel filler door.
- Manufacturer’s Website: Many car manufacturers offer tire maintenance info on their official websites. You can input your vehicle’s make, model, and year and look for the recommended tire pressure information. It can be a very useful option if you don’t have your owner’s manual or the door jamb sticker.
- Consult a trusted mechanic: A trusted mechanic can help you determine the recommended tire pressure for your vehicle and ensure it is properly maintained.
How to Check the Tire Pressure?
By following these steps, you’ll be able to accurately measure the tire pressure for your vehicle-
Gather the Necessary Tools
To check your tire pressure accurately, you’ll need the following tools:
- Tire Pressure Gauge: A dedicated tire pressure gauge is essential for this task. There are various types, including digital, dial, and pencil-style gauges. Digital gauges are user-friendly and provide precise readings.
- Owner’s Manual: This contains essential information about your vehicle, including the recommended tire pressure. It’s an invaluable reference during the process.
Prepare Your Vehicle
Before you start measuring the tire pressure, it’s vital to prepare your vehicle appropriately:
- Park on a Level Surface: Choose a flat and level surface for parking your vehicle. This ensures that the tires are not under additional stress from an uneven surface.
- Tire Temperature: You have to check your tire pressure when the tires are cold. This means waiting for at least three hours after driving. Measuring tire pressure when they are cold provides the most accurate readings.
Identify the Valve Stem
Each tire has a valve stem, which is a small, cylindrical protrusion that extends from the tire. This is where you’ll attach the tire pressure gauge.
Measuring the Tire Pressure
Now, let’s proceed with measuring the tire pressure:
- Remove the Valve Cap:
Unscrew the small cap that covers the valve stem and set it aside. This allows you to access the valve for measurement. - Use the Tire Pressure Gauge: Based on the gauge variety you possess:
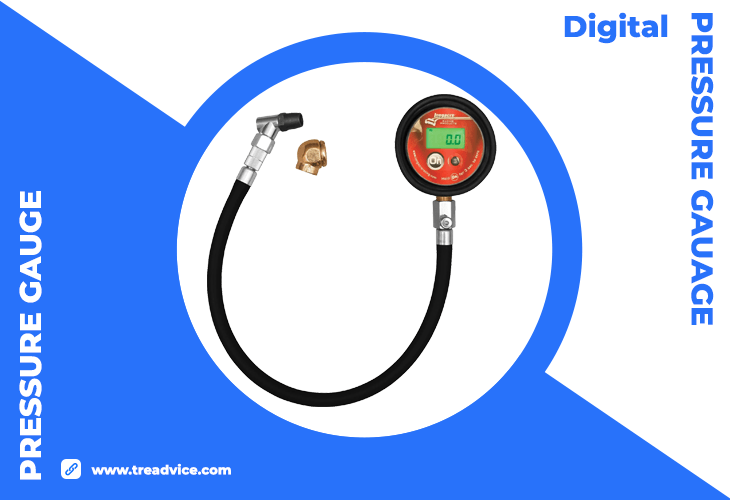
Illustration: Digital Tire Pressure Guage – Longacre 52-53003 Semi Pro Digital Tire Pressure Gauge, 0-60 PSI
Usage: Affix the gauge to the valve stem by firmly pressing it onto the valve. Wait for the reading to stabilize, which may take a few seconds. The digital screen will display the pressure measurement.
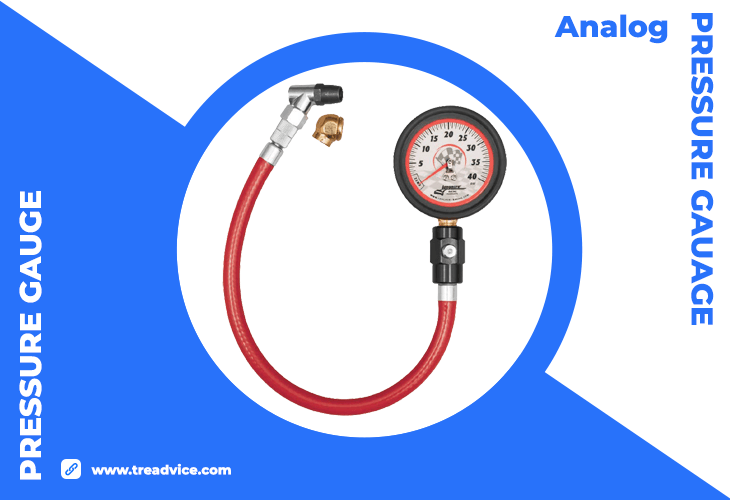
Illustration: Analog Tire Pressure Guage – Longacre 52-52013 Tire Pressure Gauge 2-1/2 Inch 0-40 PSI
Usage: Press the gauge nozzle onto the valve stem and read the pressure from the analog dial where the needle points.
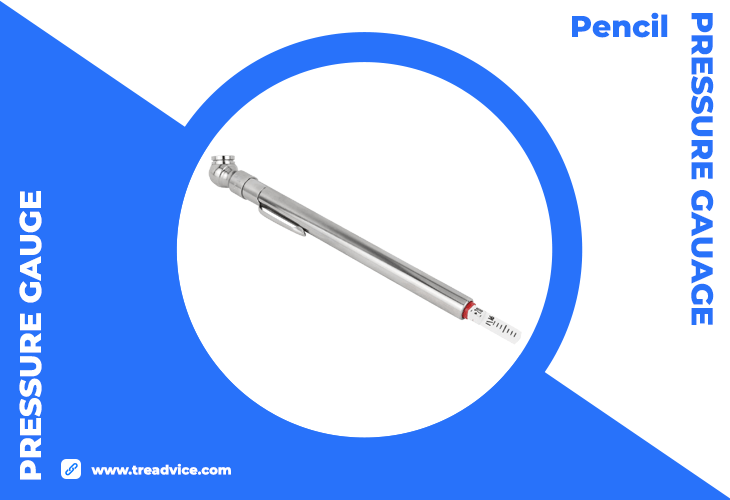
Illustration: Pencil Tire Pressure Guage – Milton S-920 Pencil Tire Pressure Gauge With Tread Depth Gauge
Usage: Attach the gauge to the valve stem, and an indicator will extend from the gauge to show the pressure reading.
- Reading the Pressure: Once the gauge has provided a stable reading, note the tire pressure measurement.
Compare to Recommended Tire Pressure
The next step is to compare the measured tire pressure to the manufacturer’s recommended tire pressure.
As mentioned above, this information can typically be found in the following places:
- Owner’s Manual: Check the owner’s manual for the recommended tire pressure. It often provides specific recommendations for the front and rear tires.
- Door Jamb Sticker: Open the driver’s side door and examine the door jamb, where you’ll often find a sticker displaying important vehicle information, including the recommended tire pressure for your specific car.
- Glove Compartment: Sometimes, there’s a sticker or a card with tire pressure information inside your car’s glove compartment or on the inside of the fuel filler door. This can serve as a handy reference point.
Adjusting Tire Pressure
Depending on the comparison between your measured tire pressure and the recommended tire pressure, you may need to make adjustments:
- Adding Air: If the measured tire pressure is below the recommended level, you will need to add air to the tire. Use an air compressor at a gas station or a portable one for this purpose. Add air gradually and check the pressure intermittently to avoid overinflating the tire.
- Releasing Air: If the measured tire pressure is higher than the recommended level, release some air until it matches the recommended pressure. To release air, press the gauge’s nozzle onto the valve stem or use a dedicated valve stem tool.
Replace the Valve Cap
After you have adjusted the tire pressure to match the manufacturer’s recommendations, screw the valve cap back onto the valve stem. This cap helps prevent dust and debris from entering the valve.
Repeat the Process for All Tires
To ensure that all your tires are correctly inflated, follow the above steps for each tire, including the spare tire if your vehicle is equipped with one.
Double-Check the Pressure
After making adjustments to your tire pressure, double-check the pressure to ensure it matches the recommended levels. This is an important step to confirm that you’ve achieved the correct tire pressure.
Maintaining Your Tire Pressure
Checking and adjusting your tire pressure should be part of your regular vehicle maintenance routine. To maintain your tire pressure effectively:
Frequency
It is recommended to inspect your tire pressure on a monthly basis.
Measuring the Tire Pressure Without a Gauge
It’s not always possible to carry a gauge so we often find ourselves asking a question “How to check the tire pressure without a gauge?”
Measuring tire pressure without a gauge is less precise than using a dedicated tool, but there are several methods you can employ for a rough estimation.
Here are five methods:
- Visual Inspection: Examine your tires carefully. Look for any noticeable signs of low tire pressure, such as a flattened or bulging appearance. Underinflated tires often appear deflated compared to their normal, round shape.
This method is straightforward but can be less reliable, as visual cues may not always indicate slight underinflation. - Hand Squeeze: Gently press your palm against the tire’s sidewall. If it feels very firm, it might be overinflated. If it’s too soft, it could be underinflated. Use your judgment based on how the tire feels.
While it provides a rough estimation, it’s not very accurate, and the sensitivity of your hand may vary. - Tread Wear Pattern: Inspect the tire tread. If it’s worn more on the edges than in the center, it might be underinflated. Conversely, if it’s worn more in the center, it might be overinflated. Uneven wear suggests potential issues with tire pressure.
- Use Your Foot: Park your vehicle on a level surface. Carefully drive over a smooth, clean surface, such as a paved driveway, and listen for tire noises. Low-pitched thumping sounds could indicate underinflated tires.
It’s a simple method to detect obvious underinflation. - Penetrometer: Use a simple penetrometer, like a ballpoint pen, to press into the tire’s sidewall. If it goes in too easily, the tire may be underinflated. If it’s very hard to penetrate, it may be overinflated.
This method provides a tactile assessment but is quite subjective and less accurate.
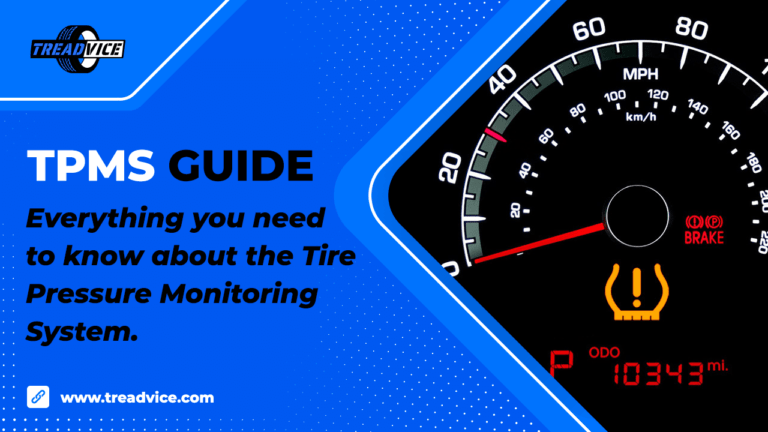
TPMS (Tire Pressure Monitoring System) and how does it function?
The primary role of TPMS is to monitor the air pressure in your vehicle’s tires and alert you when it detects significantly low pressure in one or more tires.
The Tire Pressure Monitoring System (TPMS) is a safety feature that continuously checks tire pressure and alerts the driver to low pressure. It prevents accidents by maintaining proper tire pressure, which ensures safe handling, braking, and fuel efficiency.
There are two types:
- Direct TPMS, using individual sensors in each tire.
- Indirect TPMS, which estimates pressure based on wheel speed.
When TPMS detects significant underinflation, it triggers a dashboard warning light, prompting the driver to address the issue. This enhances safety, extends tire life, improves vehicle performance, and reduces environmental impact.
How to reset the tire pressure light?
The TPMS light is a big help for your car’s safety and performance. It tells you when your tires need more air to make sure your vehicle handles well, brakes smoothly, and stays stable on the road.
The appearance of the TPMS light can vary slightly between different car models, it usually takes the form of an icon depicting a tire with an exclamation point inside it. When this light comes on, it’s a clear signal that there’s an issue with the tire pressure in one or more of your vehicle’s tires.
The primary purpose of the TPMS light is to remind you to inspect and adjust your tire pressure, ensuring both safe driving conditions and optimal fuel efficiency.
To reset the tire pressure light (TPMS or Tire Pressure Monitoring System light) in your vehicle-follow these steps.
- Ensure Proper Tire Pressure: Before anything else, make sure your tires have the right amount of air. You can use a tire pressure gauge to measure and adjust the air in your tires if needed.
- Locate the Reset Button: The TPMS reset button is usually located in the driver’s compartment. It may be on the dashboard, near the steering wheel, or within the instrument cluster. If you’re uncertain about the precise location, consult your owner’s manual for guidance.
- Press the Button: When you find the reset button, press and hold it for a few seconds. The TPMS light should start flashing to show it is being reset.
- Observe the Light: After taking a few moments, the TPMS light should turn off, indicating that it’s been reset. If your car requires a drive to reset, follow the instructions in your manual.
- Consult the Manual: If you can’t find the reset button or have trouble with the procedure, read your car’s manual for specific guidance.
- Watch for Persistent Issues: If the TPMS light stays on after resetting, there may be a more significant issue with your tire pressure or sensors. In this case, it’s a good idea to have a mechanic check your car.
Different cars may have slightly different ways to reset the TPMS, so following your owner’s manual is essential to get it right. Resetting the TPMS helps ensure your tires are safe and that your car runs efficiently.
The most popular or common location of the TPMS light reset button
The most popular location of the TPMS light switch – is your car’s dashboard, right within the instrument cluster.
A gauge cluster, also known as an instrument cluster or dashboard, is a component of a vehicle’s interior that displays various important information to the driver. It is typically located behind the steering wheel, within the driver’s line of sight. The gauge cluster consists of analog or digital instruments and indicators that provide essential data about the vehicle’s performance and status while driving. You can find the tire pressure (TPMS) light in that section along with the reset button.
Frequently Asked Questions (FAQs)
Driving with improper tire pressure over an extended period can lead to several issues:
- Increased Wear and Tear: Underinflated or overinflated tires wear unevenly, reducing their lifespan and necessitating more frequent replacements.
- Poor Fuel Efficiency: Underinflated tires increase rolling resistance, leading to higher fuel consumption.
- Safety Risks: Improper tire pressure can compromise vehicle handling, increase stopping distances, and raise the risk of tire blowouts, especially at high speeds.
- Environmental Impact: Higher fuel consumption results in more greenhouse gas emissions, contributing to environmental degradation.
Temperature has a significant impact on tire pressure:
- Cold Weather: Tire pressure decreases in colder temperatures because air contracts. For every 10°F drop, tire pressure can decrease by about 1-2 psi. It’s important to check and adjust tire pressure more frequently in winter.
- Hot Weather: Tire pressure increases in hotter temperatures as air expands. Ensure tires are not overinflated during summer months. It’s best to check tire pressure early in the morning when temperatures are cooler.
Yes, you can use public air pumps at gas stations for checking and adjusting your tire pressure. Here are some tips:
- Bring a Tire Pressure Gauge: Public gauges can be inaccurate. It’s better to bring your own reliable gauge to double-check the pressure.
- Check the Manual: Refer to your owner’s manual or door jamb sticker for the correct pressure.
- Be Cautious with Accuracy: Public air pumps may vary in calibration, so use them cautiously and cross-check with your gauge.
Nitrogen inflation can offer several benefits over regular air:
- Consistent Pressure: Nitrogen is less susceptible to temperature changes, maintaining a more consistent tire pressure.
- Reduced Oxidation: Nitrogen-filled tires are less prone to oxidation, which can degrade rubber and tire components over time.
- Longer Tire Life: Potentially extends tire life due to reduced fluctuations and oxidation. However, for regular daily driving, the benefits are marginal. Regular maintenance and checks are more crucial than switching to nitrogen.
Choosing the right tire pressure gauge involves considering the following factors:
- Type of Gauge: Options include digital, dial (analog), and pencil-style gauges. Digital gauges are often more accurate and easier to read.
- Accuracy: Look for gauges with high accuracy ratings. Some gauges have certification for accuracy standards.
- Durability: Choose a gauge made from durable materials, especially if you plan to keep it in your car.
- Ease of Use: Consider how easy the gauge is to use, especially in low-light conditions or if you have limited mobility.
Uneven tire wear can indicate several underlying issues:
- Check Tire Pressure: Ensure all tires are inflated to the recommended pressure.
- Wheel Alignment: Misalignment can cause uneven wear. Have your vehicle’s alignment checked and adjusted if necessary.
- Suspension and Steering Components: Worn or damaged components can lead to uneven tire wear. Inspect and replace any faulty parts.
- Tire Rotation: Regularly rotating your tires helps ensure even wear. Follow the manufacturer’s recommendations for rotation intervals. If you notice uneven tire wear, it’s important to address the issue promptly to prevent further damage and ensure safe driving conditions.
Conclusion
Maintaining the correct tire pressure is a simple yet crucial aspect of vehicle maintenance that ensures your safety, improves fuel efficiency, extends tire lifespan, and benefits the environment. By regularly checking and adjusting your tire pressure, you can avoid the common pitfalls of underinflated or overinflated tires and enjoy a smoother, safer ride. So, the next time you’re about to hit the road, take a few moments to check your tire pressure. Your car, your wallet, and the planet will thank you. Safe travels!